By Michael Cieslak
By this time, you have spent months planning your home haunt, meticulously determining where each and every prop should be placed. You’ve arranged your material to maximize your Spooky Quotient (SQ), but it still looks like something is lacking.
Your problem? You need to populate your haunt. Without an array of characters, all that you have is a diorama, a set. It’s like being in a creepy cabin in the woods. Sure, it’s scary, but after a while you get used to it. What you really need to get the blood pumping is a chainsaw-wielding maniac to burst through the door.
Pun intended.
 The best way to do this is to have actual people in costume there to help you scare the little demons and goblins. Now, I understand that is not always an option. Don’t fret, your old Uncle Zed is here to help! I’ll show you how to make friends and influence people.
By that I mean literally build people and use them to scare other people.
Calling All Creatures
Some people who are looking to up the stakes in their yard haunts spend a lot of time looking for cast off mannequins. Unfortunately, the ability to acquire them has become rather difficult as of late. The demand for used dummies has come to the attention of most department store owners. Your chances of finding one in the dumpster behind Sears are extremely rare. Naturally, you can order them on-line. Expect to pay around $100 for a life-sized or near-life sized plastic model, and anywhere from $150 to $400 for fiberglass. Halloween prop supply companies have mannequins made from a wide variety of material. The “inexpensive foam” models usually run about $400 and the prices go up from there.
The reason for the higher price is that the products supplied by the Halloween stores are usually not blank slates. You are paying for material that is already mutilated, painted, and gory. The exception would be the inflatable figures which are cheap, but not posable. They are also susceptible to high winds and puncture damage.
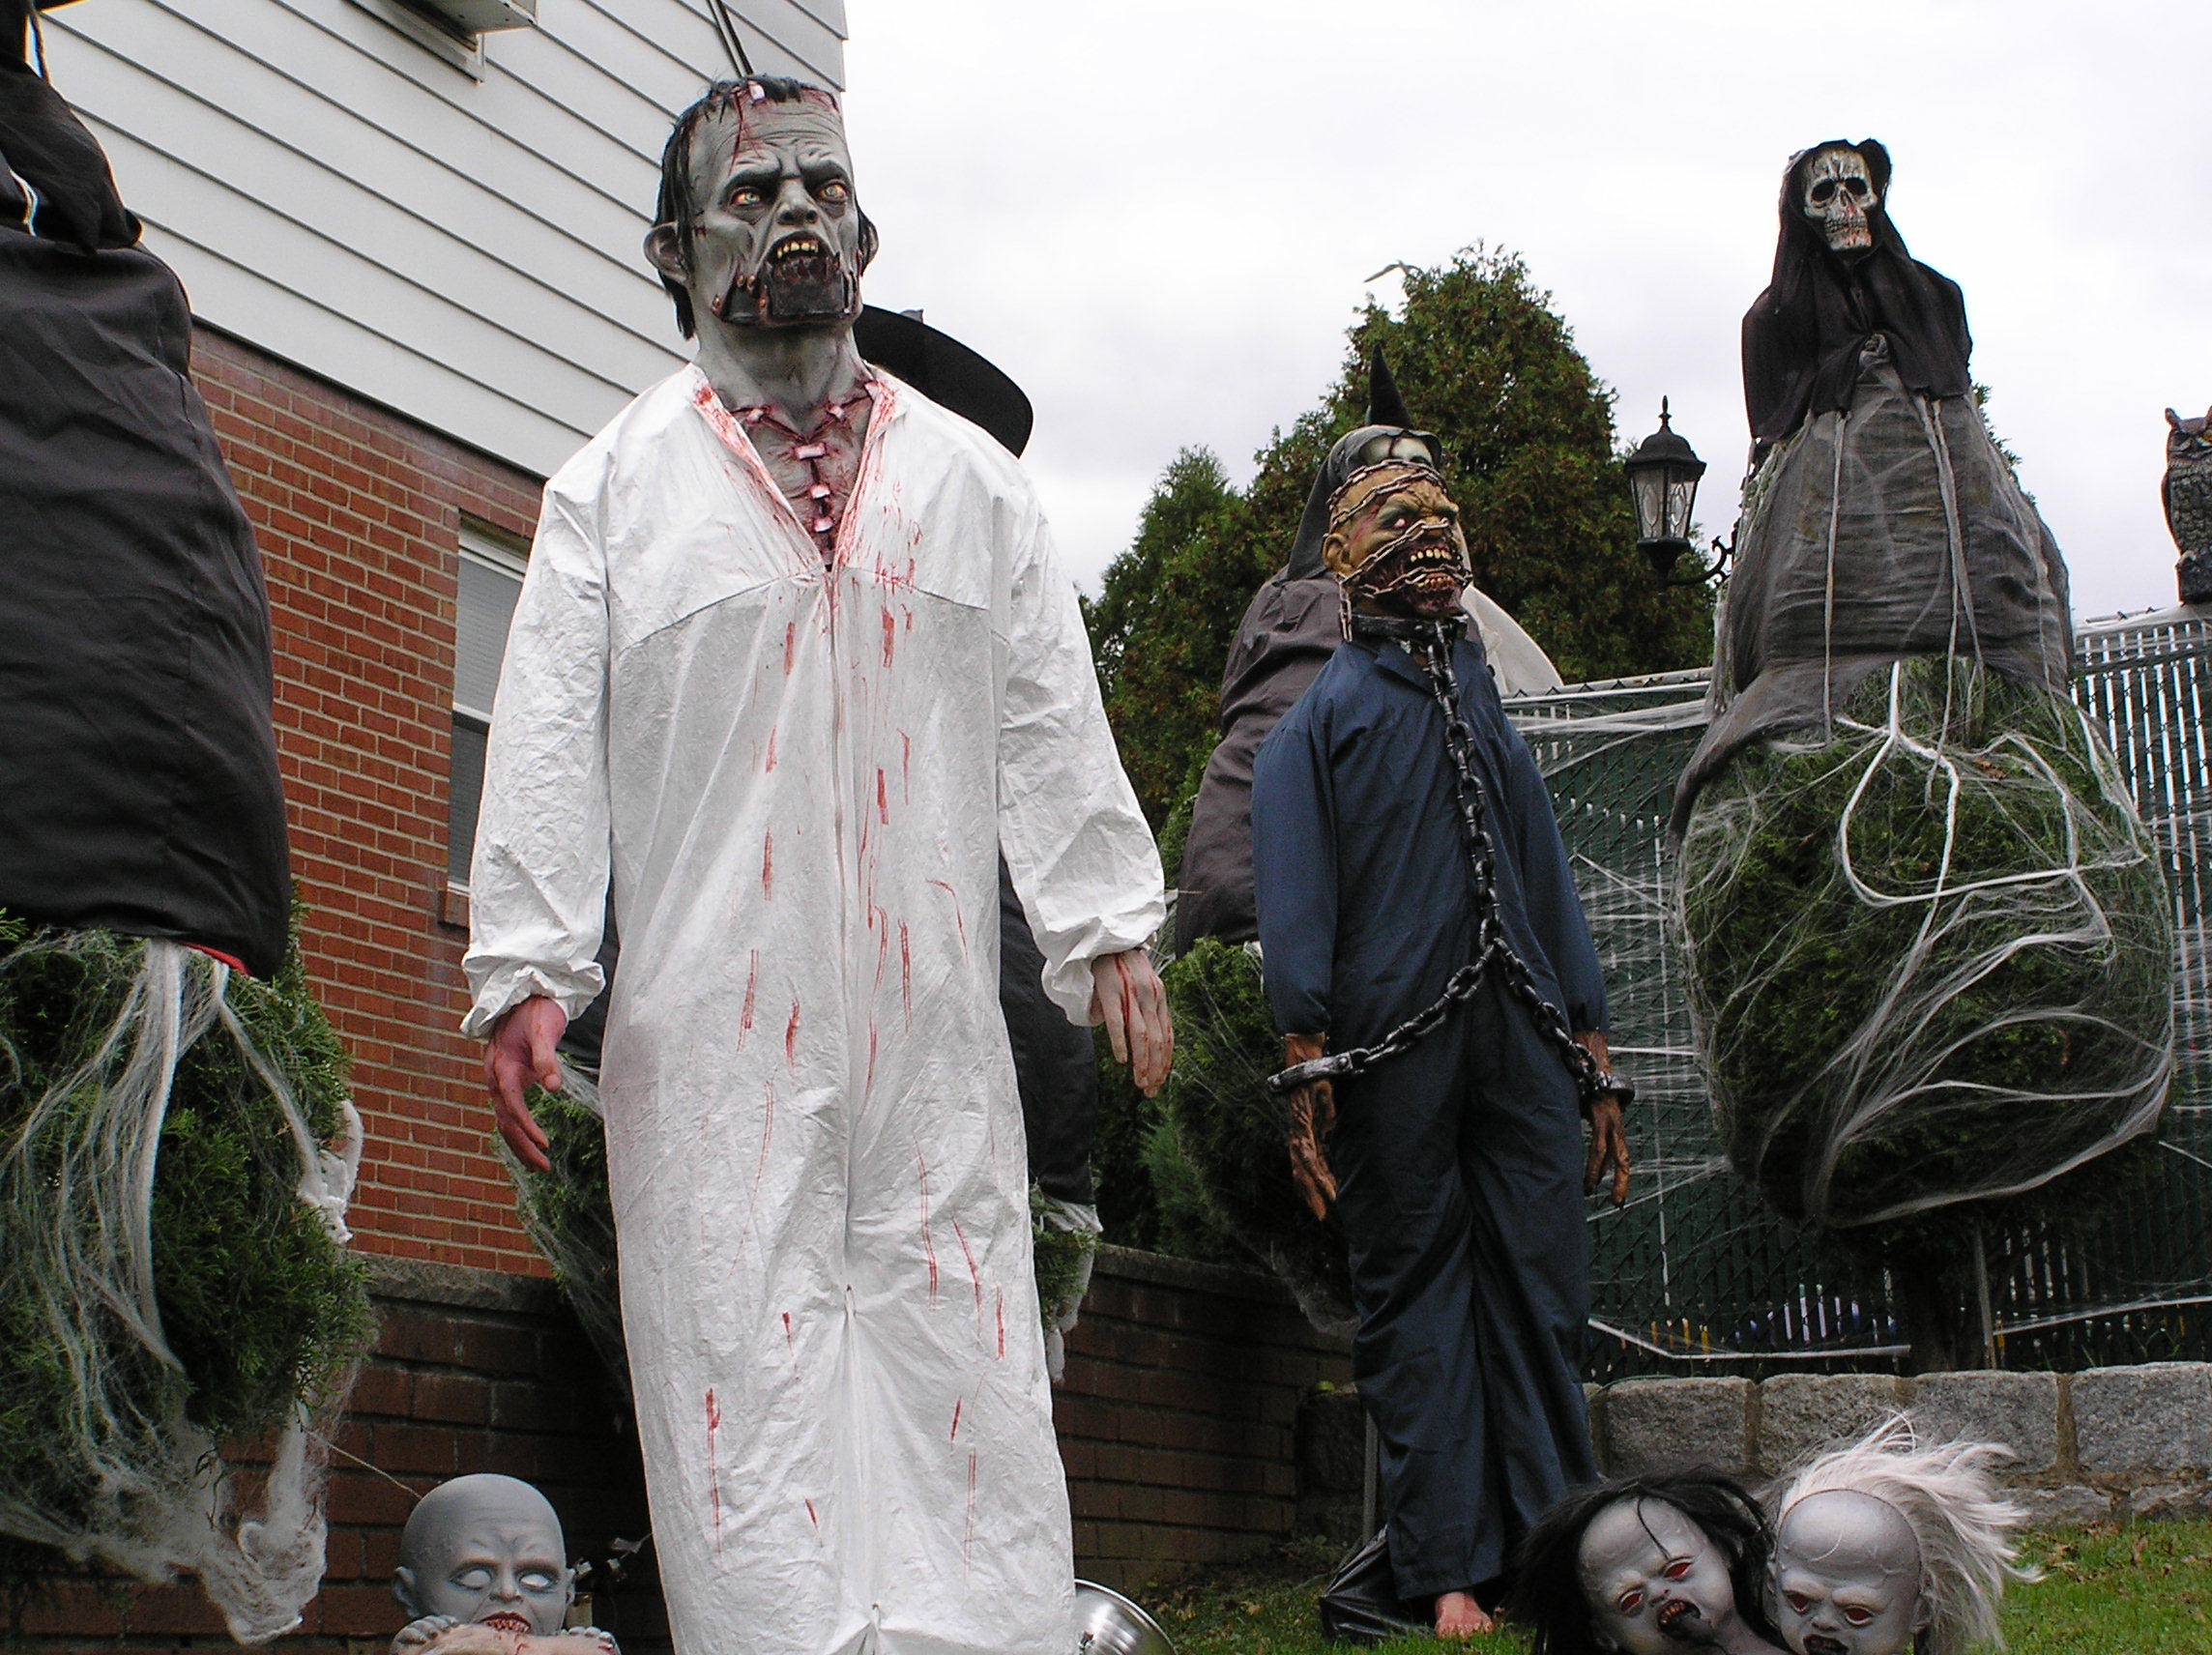
Given that you will probably want more than one figure in your yard, allow me to suggest a few alternatives. Most of the figures in my own yard are built around a chicken wire frame. These models are inexpensive to build, can be built to your own size and specifications, are posable, and reusable. All you need is a roll of chicken wire and a pair of tin snips. I also recommend a pair of sturdy gardening gloves to protect your hands. Simply create a large cylinder for the body, folding in the top portion to support the head, and smaller cylinders for arms and legs. The trick to attaching them is to have one side a little longer than the other, allowing a more limb-like connections (instead of arms that stick straight out to the sides).
The next step to turning them from wire frames into someone spooky is dressing them. If you want, you can cover your bodies with papier-mâché, but I find this unnecessary, as it adds the additional task of waterproofing your monsters. I just cover the wire with whatever I am dressing the creature as. Old shirts, pants, or suits are great for zombies. To add some realism, roll the clothing in the dirt before dressing them. Street clothes are also great for werewolves. I am a huge fan of creatures wearing robes — a larger than life Death figure, demons, etc. (This is primarily because my legs tend to come out a little on the thin side, and with robes you don’t have to worry about legs at all, just the head, torso, and arms!)
The only real problem with wire frame figures is that they tend to be light. A strong wind will knock them over, or occasionally turn them airborne. My wife has a great video of me futilely chasing my Grim Reaper across a park. To avoid this, and to give the figure some stability, I use PVC pipes planted in the ground. Fishing line is an excellent tool for attaching a ghoul to a fence, post, or other structure. Another way to keep them grounded is to buy a set of cheap tent stakes, the ones that look like metal candy canes. Simply drive the stakes into the ground with the loop through part of the chicken wire.
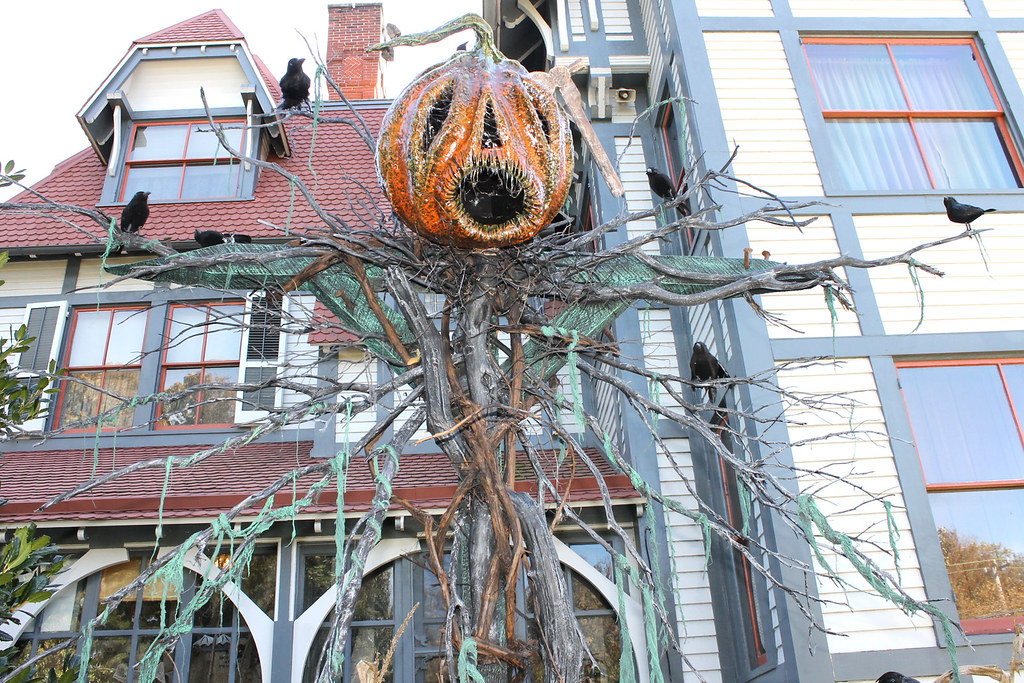 Anything can be used as a stand for a home-made mannequin. I’ve used rain barrels, a broken oscillating fan, even the bushes by the house. Tomato cages make great goblin sized people. they can also be wrapped in spider webbing to create the look of a person trapped by a giant spider (or a monster sized spider egg sack). One of my reoccurring characters is a pumpkin-headed scarecrow. I place the head and arms in one of the bushes and it looks like it is coming out of the woods.
You can make your own heads and hands, if you have the sculpting skill. If you are making them out of paper mache, make sure to add enough salt to prevent mold growth and make sure they are completely dry before painting. You might also consider a water resistant shellac as well. I take a much easier route. Almost every Halloween store places its material on sale the day after Halloween. The horror themed retail outlets that spring up every year rent their spaces on limited leases. This means that by the middle of November they have to get all of their merchandise (and their displays in some cases) out of the building. Most would rather sell than ship and store. This is the time to score the essentials like spider webs as well as any big ticket items for half of what you would normally pay–although it does require a bit of foresight on your part. I always pick up a couple of masks and sets of gloves. Theses become the heads and hands of the creatures in my yard the following haunt season. If you follow this method, you can have a wide selection of creatures to choose from after only a few years.
If you will be using masks, I recommend picking up some inexpensive styrofoam heads typically used as wig stands. You can also make heads out of chicken wire or styrofoam balls (available at any craft store), but the heads fill out the masks better. To really make your people stand out, focus on the eyes. Plastic animal eyes can be purchased relatively cheaply from taxidermy supply companies. Most are semi-spherical set on posts which can be driven into your styrofoam head without a problem. Get the creepy looking ones like those for great cats or goats. There are also people who make eyeballs which light up. I found mine on eBay for only a few dollars. Two AA batteries converts a somewhat creepy mask into a demon with glowing eyes.
Skeletons, skulls, and bones of all sizes are also essentials for any spooky house. If you will be doing a lot of work to them (for example, partially melting them for a really creepy look), get the cheap ones available at a drug store or at craft stores. Michael’s usually has their Halloween material out by the end of August/beginning of September and on sale by October to make room for Christmas material.
For quality skulls and skeletons, buy a Bucky. These are anatomically correct skeletons which are not quite good enough for use in a school or university. They can be purchased online from a number of retailers, simply search for “Bucky Skeletons.” The Skeleton Store and the Skeleton Factory both carry reasonably priced Buckys. These are well made, available in different sizes, and will last for years. I’ve had my Bucky for over a decade and he’s still in great shape. These same retailers will sell skulls, skeletal arms and legs, and even bones by the pound.

There are a lot of videos which will show you how to “corpseify” your Bucky, should you want a rotted corpse look. This method uses strips of cloth and stains to turn the white bones into something which looks like it was recently dug up.
Finally, consider simply hinting at more people. A well placed piece of white fabric can and will look like a specter when lit properly. If you have a lot of trees or bushes, you can populate them with hidden creatures using toilet paper rolls. Cut two eye shaped holes in the roll, place a lit glow stick inside, and place the roll deep in the bushes. When the sun sets you will have a bunch of eerily glowing eyes peering out from the foliage. Do this behind one well lit prop, say a spider or a bat, and people will assume that there is a whole colony of similar creepy crawlies in your yard.
One last note, when you are planning your haunt, keep in mind how your yard will look in October. Those lush, green trees that are perfect for hiding things might be bare branches come the Fall.
Stay tuned next week for How To Haunt Your Home Part IV!