Categories
Creepy Crafts

How To Haunt Your Home, Part IV: Lights, Props, Action!

Zed's Hat

By Michael Cieslak

Why are we afraid of the dark?

Humans rely on sight far more than any of our other senses, so it seems a pity that our night vision is not as good as that of a lot of other predators. In addition to our poor sight in the dark, we have giant brains which can imagine all kinds of terrifying things which could be inhabiting that great, unseen area. I’m Zed, and today we’ll be looking at how to leverage this particular human vulnerability to scare the pants of anyone who comes to your house around Halloween.

Lighting must be considered as an essential element when setting up your home haunt. For this post, we will assume that your haunt will be designed to be viewed in the dark. Whether this means it is going to be creepiest at night or if you have built something that people will walk through does not make a difference. Either way you are going to want to control the lighting to create the maximum Spooky Quotient (SQ). 

Unfortunately, the power of light is sometimes out of our control. If you happen to have a streetlight at the edge of your yard, there is nothing you can do to diminish this illumination short of shooting out the bulb with a BB Gun. (For the record, I do not endorse shooting out streetlights with BB Guns.) What you can do, however, is control the lights which you do own. Red, green, and yellow lightbulbs are available at just about any hardware store (although you might have to downgrade from fluorescents for the evening). Even bug repellent bulbs will work in a pinch.

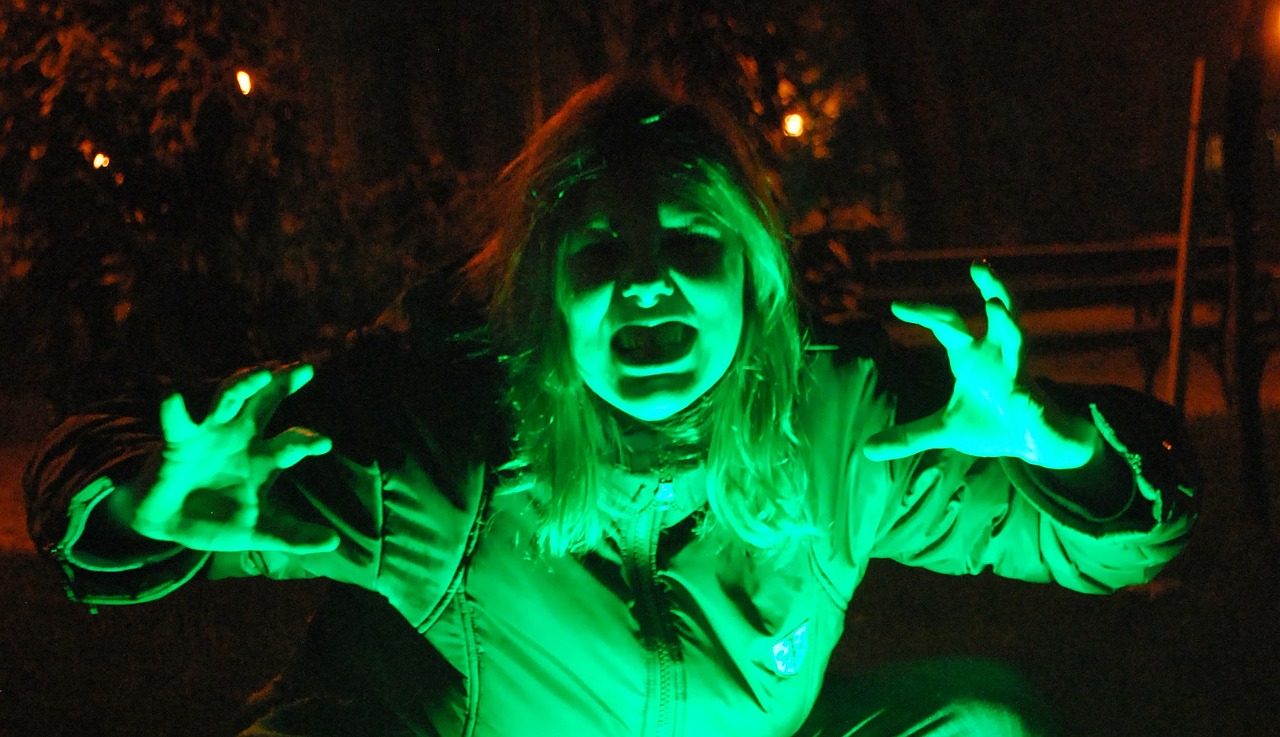
First, consider the color of the light. Many people make the mistake of grabbing a red bulb because of its blood-colored associations. Red light will tend to give things a bloody or possibly demonic cast certainly, but this is not the only choice. If zombies populate your haunt, consider a yellow or even a green lightbulb. These options can give everything a pale, sickly, almost jaundiced cast. Blue lights can create a spectral or otherworldly glow. They also work well with ghosts, animated skeletons, and aliens.

Your second concern will be the kind of lights to use. One of my absolute favorite purchases was a set of mini LED spotlights. The bad news is that manufacturer is no longer in business. The good news is that countless companies have sprung up to take their place. The benefits of these mini spotlights include color choice, the ability to mix colors, directionality, easy concealment, and energy efficiency. The ones that I use require so little electricity that I am able to connect them using stereo speaker wire.

Alternative light sources abound. Glow sticks are a cheap and colorful option. Flashlights with colored cellophane over the lens make great (and cheap!) sources of illumination. The amount of light coming from them can be limited by covering the lens with a piece of cardboard with a slit or hole cut in it. Lanterns, gooseneck lamps, and even mechanic’s lights can all be put to good use.

woman-702012_1280A note on lighting and safety: Keep in mind that the lights are going to be outdoors and exposed to the elements. Because of the way I have wired mine, I do not use the mini-spotlights in inclement weather. Be aware of positioning. Once one of my can lights, which was rated for outdoor use, slipped off of the clamp holding it and ended up pointing directly up. This allowed it to collect water from the light drizzle. Water + electricity. Not a good mix.

Definitely avoid using open flames. At best you are going to have to deal with the fact they will constantly be blown out by the slightest wind. At worst you have an open flame meeting a flowing costume. If you want to achieve a flickering candle affect, invest in flameless candles.

The third and most important thing to think about is placement. Don’t fall into the habit of always lighting things from the top down. Illuminating an object from above, be it a person or a prop, will cast many of the features in shadow, especially if the prop has a large head or hood. Even more damning is that things illuminated from above tend to appear smaller than they actually are, and nothing ruins the ominous 12 foot tall figure of the Grim Reaper like lighting it from above. Conversely, lighting something from below tends to make it appear larger than it actually is. By placing the source of illumination below a prop and a few feet out, you will create a looming shadow behind it. This also allows you to control which parts of the prop your visitors will focus on. Such an easy way to ramp up the all-important SQ of your haunt! An added benefit is that by lighting from below and focusing on the head or chest (if it is a person-shaped figure, that is) anything you put behind it — say the wires holding it in place — will be in shadow.
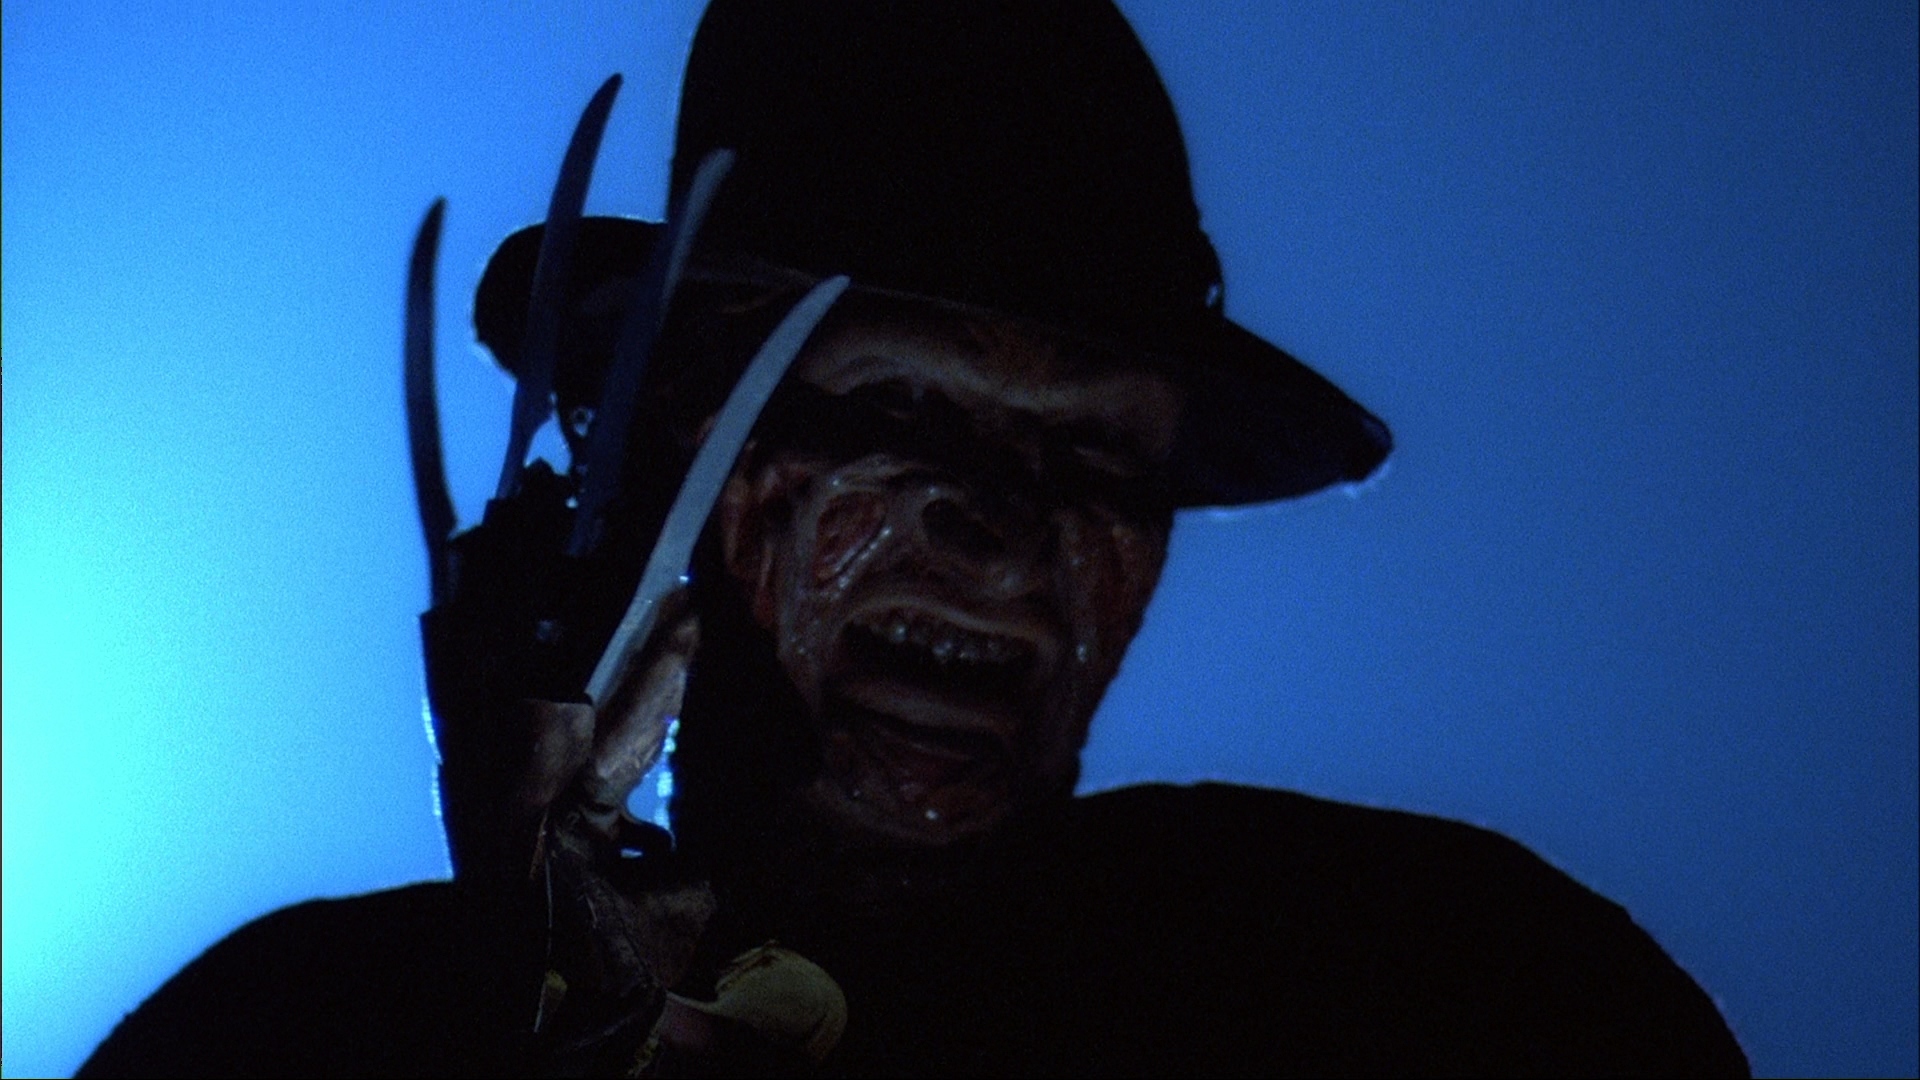
Other options abound. Another eerie affect can be created by backlighting the object. A light placed behind a prop will not only make it look bigger, it will also dazzle the eyes of the viewer, making it more difficult to see any details you might want hidden. The shadow caused by backlighting will engulf the viewers, making them feel as if they are already in the grip of whatever monster materializes before them.
As an example, think about the original A Nightmare on Elm Street (1984). When Freddy first appears to Tina, he is backlit at the end of a long alley. His shadow reaches out to her, threatening her even though he is far away:


As I hinted above, the easiest way to scare someone is to allow their own minds to do the work for you. An oblique light source, one which comes from one side or from above or below but only illuminates a portion of the prop, will force the viewer to imagine what the rest of it looks like. In most cases the portion filled in by the imagination will be more frightening than what you could actually build. In addition, shadows create the illusion of movement, lending even more believability to what is actually a static prop.
Of course, you don’t have to rely on static props. There are a number of ways to bring your props to life using everything from gravity to small motors to pneumatics. Popular moving props include spinning ghosts, crank ghosts, shakers, lifters, and poppers — my own terms. A lot can be accomplished with a small motor and a little know how. Depending upon how it is set up, a motor can cause a prop to spin in place, or it can drive a pulley system which will make that same prop move back and forth. These are often ghosts and light skeletons as increased weight will cause the motor to burn out.

Another common method of making movement is to use compressed air to cause a prop to pop up, lean forward, or shake. Pneumatics are used to make coffin lids shake as if someone is trying to get out, cause 20-foot monsters to leap forward menacingly, and everything in between. The construction of these kind of props is not necessarily something that beginners want to try on their first time out. Fortunately, there are many places where you can learn skills to safely build more advanced material. The Motor City Haunt Club meets monthly on the University of Detroit – Mercy campus. They welcome all Halloween enthusiasts from the novice to the expert. People looking to build their own props might be interested in joining a local maker space or hacker space. There are a number in the Detroit area including i3 and the Tech Shop. These and other similar facilities have all sorts of tools and equipment for use. Members pay a monthly fee and generally have to qualify on the equipment before using it for the first time. They are great places to do woodworking, metal crafting, needlework, laser etching, and even 3D printing without having to break the bank purchasing the equipment yourself.

A few final words about pneumatics and safety: unless you have the necessary skills to construct your own framework and pneumatic props, I strongly encourage you to purchase them from someone with prop making experience. DC Props and Frightprops are excellent sources for the materials you will need to safely construct your own pneumatics. There are other (less reputable) retailers who will sell things much cheaper, but it is important to note that these are generally made from things like screen door closers which are not designed to withstand the pressure put out by an air compressor and could explode. You must also make sure the prop you are using is properly affixed to the framework so it does not go flying off and injure someone when activated. Safety first, haunters!

Stay tuned next week for our discussion of special effects on a budget!

Categories
Creepy Crafts Halloween

How To Haunt Your Home Part I: Planning

Zed's Hat

By Michael Cieslak

My name is Zed, and I’m a professional home haunter. I’ve been approached by the Head Nightmarian to discuss the ins and outs of turning your home and/or yard into something terrifying this October.

For those unfamiliar with the term, the home haunter dwells in the middle ground between person who puts up some decorations at Halloween and the Haunted Attractions which spring up around the end of September. The typical home haunt has detailed props, some of which may use light, sound, and pneumatics to achieve their scares. Some home haunts are large enough that they rival the professionals, drawing hundreds or even thousands of people a night.

If you are thinking “this guy is talking about Halloween already?” then this post might not be for you. Everyone else, read on.

There are two schools of thought when it comes to decorating for Halloween. One type of person puts up a whole lot of scary stuff and hopes that something will give passersby the willies. I prefer an approach centered around a theme. This allows each prop to build on the one before. Having a theme also prevents you from breaking the bank by purchasing everything you think looks frightening. If you are going to be creating a terrifying circus, you have an excuse not to buy that wonderful alien prop. If you are creating a zombie-infested cemetery, you don’t need to drop any money on werewolf masks.

The first thing to do, then, is start to plan your haunt. Decide what space you are going to use. Will you be covering your entire front yard? What about the backyard? Will you be inviting people into your home? Each of these has different issues which you should address. Keep in mind that you will still need access to your domicile while the spooky decorations are up. This means that your spouse will want to get the car into the driveway, the postal carrier will need reach your mailbox, and you will probably have to leave to get groceries and go to work.

Or you could just take the last two weeks of October as your vacation.

Set up properly, your decorations can tell a story, even for people who don’t go through it. Passersby can “read” the story you have created as they walk by. When most people think about reading, they picture eyes moving left to right on the page. This may not always be the best set up. Spend a little time examining the traffic patterns, both automotive and pedestrian.

For example, there is a streetlight at the end of my block. Most of the drivers in my subdivision use it as an access point for the major roadway. This means that most of the traffic moving down my street is going north to south, or right to left in the case of my yard. For 2014’s haunt, I decided to tell the story of an alien invasion that raises the dead. The spacecraft I employed was set up to the extreme right, as far as traffic is concerned. The next section featured the aliens themselves, moving towards a cemetery to the left with the reanimated corpses.

Regardless of how big your haunt, your primary concern should be safety. We will be coming back to this topic again and again. Nothing ruins your Halloween fun like a lawsuit.

Here are some things to consider while planning your haunt:

The walking path
If you are going to have people walking on your property, make sure that the path they will be taking is well marked, even, and free of trip hazards. I have invested in outdoor Rope Lighting 100v available on-line and in just about any hardware store. These provide a clear, unbroken pathway for where you would like people to go.

The safety of your props
Another benefit of clearly marking the walking path is that it will keep people from wandering around where you don’t want them. Direct their motions, and they will never see the behind-the-scenes set-up. It will also keep anyone from damaging your props (either accidentally or through malicious vandalism).

Public thoroughfares
If you live in any well-populated residential area, the odds are there are ordinances requiring streets and sidewalks to be free of obstructions. It may look cool to have something hanging from the tree over the sidewalk, but if someone walks into it, there will be problems. A good rule of thumb is if you are required to clear it of snow, you probably can’t block it with a prop. Now is a good time to check with the local gendarme.

Safe Access
This includes making sure that people can get to your haunt without putting themselves in danger. Make sure that there is no chance that someone could get so scared that his or her only option is to run out into the street.

Additional Insurance
If you are going to have people actually enter your home, you might want to consider adding additional insurance for the nights that the haunt will be open. This is a fairly easy process, and most home owners’ insurance companies are happy to help. Hopefully you will never need to use it, but it is always better to err on the side of caution.

Next time we will explore theme further as well as detail some resources to get ideas and information on building your haunt.

(Original posting here)

Categories
Creepy Crafts Halloween

How to Haunt Your Home, Part Two: setting the stage

Zed's Hat

By Michael Cieslak

Welcome to part two of our discussion of how to haunt your home. As noted in our first installment, we’re investigating what is required to turn your residence into something fantastically frightening for Halloween.

In terms of full disclosure, I should let you know that my own level of haunting is probably somewhere around Beginner+ to Intermediate-. I have multiple fog machines, an extensive light array, and pneumatics. I both purchase and make my own props. I do have some experience with mask creation and foam latex prop making, but not much. My soldering skills are non-existent.

Oh, you can call me Zed.

Last time around, we discussed the importance of having a centralized theme around which your haunt is based. To explore this further, why don’t we take a quick look at two of the biggest haunts in the area, Realm of Darkness and Erebus. Both are located in Pontiac, but each approaches the idea of theme in a different way.

Realm of Darkness features the classic Quest To Defeat The Wizard. Visitors are lead through a medieval castle filled with various monsters and ghouls until they reach the Wizard at the end. All of the characters and props fits this theme.

Erebus, on the other hand, tells the story of a mad scientist who creates a rift in time and space which allows all manner of horrible things to fall into our world. Using this pretense, the owners can explain areas of science fiction technology next to dinosaurs, swamps inside of a building, and zombies and madmen inhabiting the same space.

So how do you choose your theme? The easiest way to decide is think about what scares you. If there is an idea which creeps you out, odds are it will do the same to someone else. Also, take a look at what you already have purchased. If you have already started building up a supply of props, get them out and see what they have in common. You might have your answer right there.

There are a number of staples for the haunted house which you might want to invest in. These include:

Spiders and webbing — Nothing says “old and creepy” like cobwebs, and spiders rank among snakes and heights as the things most people are afraid of. Large spider webs are also readily available at Halloween stores and are an inexpensive way to start making your house look frightening. The downside to this is that everyone else on the block will have them as well. If you do go the spider route, you might want to invest in a webspinner, a simple device that is essentially a hot glue gun with a fan attachment. This blows the hot glue wherever you point it (wind permitting) and creates gorgeous spiderwebs.

Tombstones — The cemetery is a staple backdrop, whether you are featuring zombies, ghosts, skeletons, or just something eery. They are also inexpensive, fairly easy to make, and an efficient way to make your haunt look bigger than it is. Placing large tombstones in the front of the yard and progressively smaller ones as the boneyard continues rearward will create a forced perspective effect, and the illusion that the space is much larger.

Skulls, skeletons, and bones — We’ve all got them under our skin, but for some reason people are freaked out by bones. You can use full sized skeletons as scares, skulls as background decorations, or bones in the hands of your zombies and werewolves for an added ick factor. I recommend the 4th Rate Bucky Skeleton, available from a variety of retailers, including The Skeleton Store and the Skeleton Factory. Bucky is an anatomically correct skeleton, quite sturdy (I’ve had mine for ten years or more), and it won’t break your bank.

Fog-Machines — We will go into more detail on fog machines in a later post, but they are a great way to add atmosphere.

A number of resources will help you get ideas for your haunt and in some cases learn how to make your own props.

If you are in the Metro Detroit Area, you should check out the Motor City Haunt Club. This group of haunters and horror fans meets once a month on the campus of the University of Detroit-Mercy. They discuss prop creation, lighting, sounds, fog machines, and just about everything else related to home haunting. Meetings usually feature a how-to demonstration of a Make and Take session where attendees create a prop during the meeting.

On-line Resources:
The internet is an ever-changing landscape. A number of websites devoted to home haunting are only occasionally updated, but they are plenty of archives of useful information which has already been posted. These include the Home Haunters Association, Home Haunt News, and Halloween Show.

Conventions:
Several national conventions devoted to professional Haunted Attractions can be fantastic opportunities to learn. Although some of the material may be beyond the scope of the average home haunter, there are usually also panel discussions and demonstrations which can be applied on a smaller scale. Most feature a sales floor featuring all sorts of ghoulish goodies as well. Some of the biggest and best include HauntCon, TransWorld, the Mid-West Haunters Convention, and local favorite the Great Lakes Fright Fest.

Other Material:
I recommend the following material for anyone interested in bigger, scarier Halloween material:
Boneyard Productions DVD set: Includes Horrific Haunted House Tips, Scenery Made Easy, Scares Made Frightfully Easy, and The Official guide to Haunted House Actor Training and Operations Management.

The DC Prop Builder’s Handbook: Devious Concoctions Custom Un-Earthed Creations Volumes 1 and 2. These books are excellent resources which cover everything from corpse and coffin creation to building pneumatic lifters.

Grande Illusions: Books I & II by Savini, Tom (2013) Paperback. The master of horror make-up illustrates some of the best of his cinematic creations including behind the scenes material on how they were constructed.

Stay tuned for more tips, tricks and guidance for building your best Halloween haunt yet.